The last and – for me – most interesting way to host multiple websites in a single Windows Azure deployment is to use Host Headers. This allows you to map for example www.mydomain.tld and www.anotherdomain.tld to the same cloud deployment (http://myproject.cloudapp.net) via DNS and host their content in the cloud.
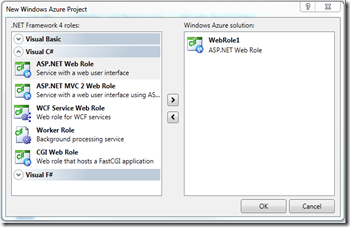
Create a new Cloud Project in Visual Studio and add a ASP.NET WebRole to this project.
Image may be NSFW.
Clik here to view.
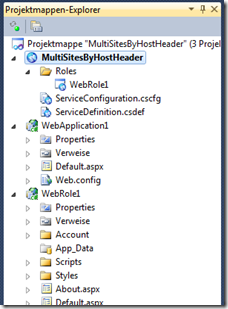
Then, add a new ASP.NET Application to the same solution. Your solution explorer should then look like this:
Image may be NSFW.
Clik here to view.
The key is again the ServiceDefinition.csfg file: But this time we need to add another <Site> element to the default <WebRole>’s <Sites> tag. The new <Site> needs an arbitrary name in its attribute name.
The physicalDirectory attribute needs to contain the path to where Visual Studio can find the files of this website to publish it to the cloud. This path can either be set as an absolute path or as an relative one. A relative path must be set relative to the ServiceDefinition.csdef file.
This new <Site> needs to be bound to the proper host header and the default <Site> also needs a host header to be set. So copy the <Binding> from the default <Site> and paste it inside the new <Site> element. Make sure that those bindings have different host headers. Otherwise you’ll get a compilation error.
After all the ServiceDefinition-file looks like this:
1: <ServiceDefinitionname="MultiSitesByHostHeader"xmlns="http://schemas.microsoft.com/ServiceHosting/2008/10/ServiceDefinition">2: <WebRolename="WebRole1">3: <Sites>4: <Sitename="Web">5: <Bindings>6: <Bindingname="Endpoint1"endpointName="Endpoint1"hostHeader="www.mydomain.tld"/>7: </Bindings>8: </Site>9:10: <Sitename="TheOtherApplication"physicalDirectory="../WebApplication1">11: <Bindings>12: <Bindingname="Endpoint1"endpointName="Endpoint1"hostHeader="www.anotherdomain.tld"/>13: </Bindings>14: </Site>15: </Sites>16:17: <Endpoints>18: <InputEndpointname="Endpoint1"protocol="http"port="80"/>19: </Endpoints>20: ...21: </WebRole>22: </ServiceDefinition>
But before you can run this Cloud Project and test it, you need to map the hostheaders to the cloud project in your DNS. For testing locally in the Azure computing simulator, you need to add the following lines to your HOSTS-file:
127.0.0.1 www.mydomain.tld127.0.0.1 www.anotherdomain.tld
Open a notepad with elevated permissions (in administrator mode) and open in C:\Windows\System32\drivers\etc the HOSTS-file. Insert the two lines and save the file again.
Now run the cloud project. Don’t panic when the default URL http://127.0.0.1:81 returns a 404. Browse to http://www.mydomain.tld:81/ and find the first application there. On http://www.anotherdomain.tld:81/ there is the other one.
Download the sample code here: MultiSitesByHostHeader.zip